
Growing up poor, my mother and grandmother cooked us traditional foods that they grew up with that helped feed many empty tummies. This is one of those meals that left us filled to the rim.
Of course now when you hear the word Haluski it conjures up a bow-tie pasta noodle with cabbage dish, which is delicious and great too.
For those of us who spend two hours cooking the "real" Haluski we just smile and say that other kind of Haluski is for quick meals.
We had both Cheese Haluski as well as Cabbage Haluski made this, homemade way. My grandmother made a Prune too but I digress.
Here is how I made the Cheese Haluski for dinner tonight. Oh, and shhh, don't tell Nana I am sharing her recipe.

This took me about two (2) hours to make today. And every one of those minutes was spent with a smile on my face knowing how hard it must have been for my Nana to do this for us.
Supplies Needed:
Flour
Eggs (2) two large
Baking Powder
Red Potatoes ( I used a Five Pound Bag)
Extra Sharp Cracker Barrel Cheese Blocks (2) 8-ounce packs
Butter (2) sticks
Large Onion (1) Chopped
Large Pots to Boil Dumpling (2) filled with cold water
Blender
Salt and Pepper to Taste
I began by chopping up one (1) large onion and browning it in a pan with one (1) stick of butter. Pay attention to the heat your cooking the onion with as you don't want to burn those onions and scorch the butter. You want to cook them until they are translucent. Take the pan off of the heat and put to the side. You will add the other stick of butter to it when the "dumplings " are ready to be coated.
I also grated the two (2) blocks of cheese on a platter.
Peel the potatoes and cut them up into cubes. Rinse.


My grandmother and mom used the small ends of the grater to puree the potatoes but I use my old faithful Blender to do a better job. No bloodied knuckles and a finer, lighter weight end product.
I put a few handfuls of the potatoes into the blender and used the highest setting for a few seconds. I dumped the result into a bowl and continued on until all of the potatoes were gone.
As the potatoes sit, they will change color a bit. No worries. They will be perfect in the end. I add the two (2) eggs now and gently, lightly sprinkle baking powder over the top of the mix. I never measure, I want these to be light and delicious so I just add a sprinkle.
I let it sit until I see the baking powder fizz a bit. Now it's time to stir, stir, stir.


Next, it is time to boil so I get the water ready and boiling. You want a nice, even boil...not too hard and fast.
Then it is time to add the flour to the mix. I know I keep saying it but again, I don't measure the flour. What your hoping to get is making this a dumpling-like texture but not a paste. Too much flour and you will have heavy sinkers and that is not good. I add some flour and then stir. Then add a bit more.

To test to see when they are ready to be dropped into the water, I do the hot water/spoon test. I dip a spoon (that I will be scraping the mix off of a plate and into the water) in the boiling water and then dip it into the mix. If it comes out clean, you are ready. ( see pic below the last pic in the first row).

I plate the mix and I take each platter of mix to the stove and CAREFULLY scrap off a dollop of mix into the water, wetting the spoon with each release. It can be splashy so be careful. They will sink when first scraped into the water but then immediately begin to float. It won't take long to cook them.
I cook using two pots so they don't stick to each other and you will be able to tell when they are almost done by their translucent appearance.
Then it is time to drain them.


As you can see in the bottom row photo, they are starchy. I drain them into a colander, one pot at a time, and rinse them with warm/hot water while gently stirring. Allowing the water to drain from the colander, I then put the first batch into a clean mixing bowl and add a generous layer of the shredded cheese on top. Then I drain the second pot and repeat the same procedure.


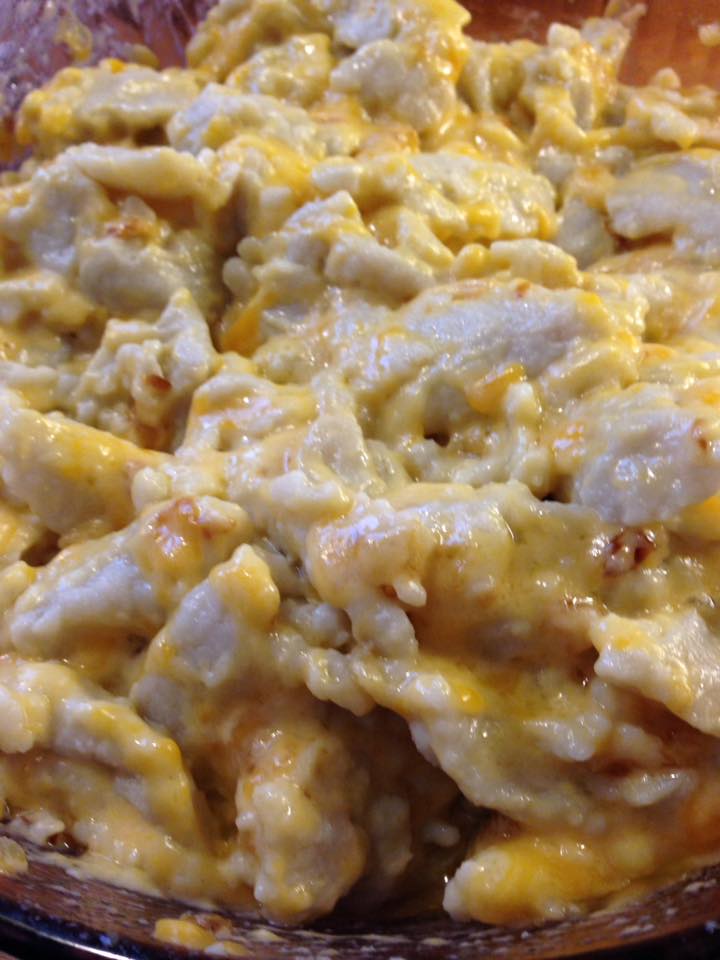
Now is when I melt the second stick of butter in the onions/butter pan from earlier. Carefully again, don't scorch the butter. Then I dump the butter and onions mixture into the bowl with the Haluski and cheese. Carefully mix all of the ingredients together.


It is cheesy, and light and may need a bit of salt and pepper to taste. And yes, I know it is a ton of work and the cleanup is staring you in the face. But the reward is worth it. Don't give up if your first try isn't picture perfect. My first try (on my own) was hilarious. I used too much baking powder and they all DISSOLVED in the water and when I dumped the pot....there was nothing left but starchy water.
I hope you too come to love this "homemade" version of Haluski as much as I do. This recipe passed down through our family has saved us many times from going hungry. And isn't that what Nana's are for? Love you Nana.